 |
 |
 |
|
|
|
|
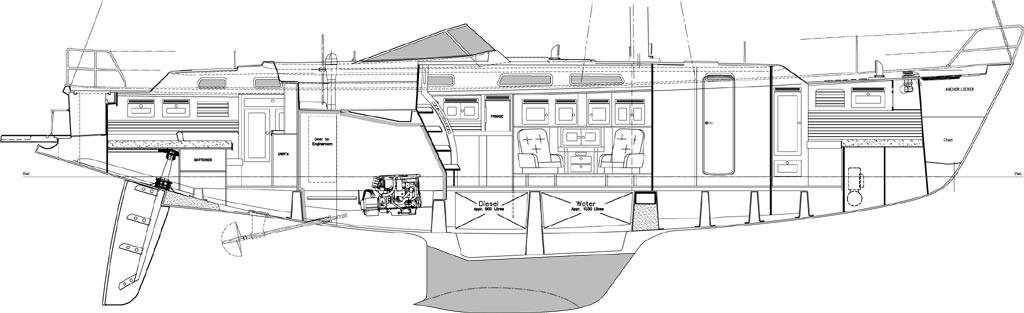
Here are some drawings originally created by Hallberg-Rassy that we modified to show the layout of Second Wind.
Click on a label on the layout diagram below to see the interior photos from each area on this page. To see descriptions with the interior photos, click here.
Here is a diagram of the side view of Second Wind.